Wednesday, September 11, 2019

Making an Early 19th Century Mourning Dress


Extant bodice c. 1800
During October, the 1820 Col. Benjamin Stephenson House features a month-long exhibit entitled, Mourning Col. Stephenson. Colonel Stephenson died in the house on October 10, 1822. In honor of his memory, we set up each room of the historic home to depict six different vignettes starting with the day that he died. Displays include the sick room, the inventory of all his possessions, and a funeral in the parlor. The primary focus of the exhibit is to educate visitors on mourning customs in the early 19th century and the hardship faced by the Stephenson family after the Colonel's untimely death.

An important part of the exhibit is the clothing our interpreters wear during tours. We want to give visitors an idea of the different types of clothing, fabric, and accessories worn during the mourning process by men, women, and children. The material culture of public displays of mourning is very different in the early 1800s compared to our current practices.

The mourning dress I have worn for several years is lovely dull black silk that drapes like a dream but it's back closing with drawstring ties at the waist and neck. This type of dress is exceedingly difficult for me to finish dressing since I'm not double-jointed or as limber as I used to be. There are also times when there are no other interpreters available to help. This is a real problem when there is a group of visitors waiting for a tour and the docent (me) can't get dressed (the struggle is real, people).  Besides my silk gown is starting to show it's age and it's time for something new.

 In this photo, I'm wearing my silk dress during a past Mourning Col. Stephenson exhibit. 


In truth, I've wanted to make a new mourning dress for a while but just couldn't decide exactly what I wanted it to look like. Most important it needed to be front closing and adjustable. I also wanted it made out of bombazine. Several bolts of bombazine were purchased by Col. Stepheson's widow, Lucy, as she outfitted her family following his death. This fabric was a mixture of wool and silk typically used to create mourning clothes worn during deep mourning. Unfortunately, bombazine is no longer made so wool crepe (another common mourning fabric very similar to bombazine) would have to suffice. The only thing left to figure out was what pattern to use.

Last year, I made a dress for my daughter using Laughing Moon #126 Ladies Round and Trained Gown with High Stomacher Front, c. 1800-1810. The dates of this dress are earlier than those interpreted at Stephenson House (1820-1825) but it's an easy pattern to work with as well as perfect for my needs (front closing and adjustable). It is also very similar to dresses depicted by Anna Maria Von Phul in her paintings of our area (St. Louis, MO, and Edwardsville, IL) in the late 18-teens. It's a perfect dress pattern to use as a jumping-off point for this project.

The internet offered some inspiration but one extant garment, in particular, kept pulling me back. The bodice was the only part of the dress to survive and was sold on eBay as a study garment. The lace around the neckline is simple and elegant plus the bodice is very similar to the LM pattern. I tend to gravitate to simple details since my period garments need to be easy to work in but also a style Lucy Stephenson may have worn. This remanent would be my inspiration.

This bodice was sold on eBay as a study garment. The only information I was able to find said "Original Empire Period Ball Gown Bodice, c. 1800 for study". 

Inside view of the extant bodice. The lining appears to be polished brown cotton but it could also be linen. Without more information or better photos, it's hard to tell. Brown polished cotton was a very common lining fabric during the period.

This bib appears to be attached to the right side of the bodice.  Obviously, the snap was added at a later date. My bib will be attached to the front skirt panel, not the bodice.

Back view of the bodice. I love the faux buttons down the center that match the ones on the bib front. The small peplum is a lovely detail too but not sure it'll be a detail of my new dress. My back piece is also going to be wider since I have the shoulders of a linebacker in full gear but it's also a better representation of the styles of the 1820s.

Let the Sewing Begin!!

Yesterday was spent copying the pattern pieces needed for my size. I never cut my actual paper patterns but trace the pieces onto pattern fabric. This allows me to use all the sizes of a pattern more than once without destroying it for one project. This step took most of my afternoon and evening but it was totally worth it.


The pattern pieces for the bodice are ready to go. 

My mockup went together really quick. It fit perfectly without any adjustments. That NEVER happens to me...EVER!. Usually, something has to be changed or tweaked but not today. The sewing gods were smiling on me.

The fabrics were already in my possession as well. I had already purchased several yards of wool crepe and the polished cotton is a standard item in my fabric stash, so I jumped right in and started putting the bodice together.  This is my favorite part of creating a period garment; construction.  I love it when everything falls into place.


The lining is all sewn together. I used brown polished cotton similar to what I believe the eBay study garment used.

Most of my interior seams are done on the machine these days. In the past, my garments were sewn completely by hand but my hands can't take it anymore. Whenever possible, I sew by hand because it makes the garment lay so much better. Unfortunately, my hands are hurting today so interior seams are getting the machine.

The fashion fabric is sewn together but it's hard to tell in the photo. This black wool crepe has a wonderful drape. The fabric is not very thick. It also has a dull appearance, making it perfect for mourning clothing.

The front edge of the outer bodice is folded under 1/4" in preparation of it being attached to the lining in a later step. It's hard to see it clearly in the photo because of the dark color.

The outer bodice and lining are pinned wrong sides together. The neck edges are folded 5/8"  (could be less but I was using the measurement from the pattern) to the inside and sandwiched between the two layers. The neck edge is ready to prick-stitch. Prick-stitching makes a flat seam when joining two pieces of fabric together.

Step one of the prick-stitch

Step two of the prick-stitch

Prick-stitching as seen from the inside after several stitches.

How the finished prick-stitching looks from the right side of the bodice. 

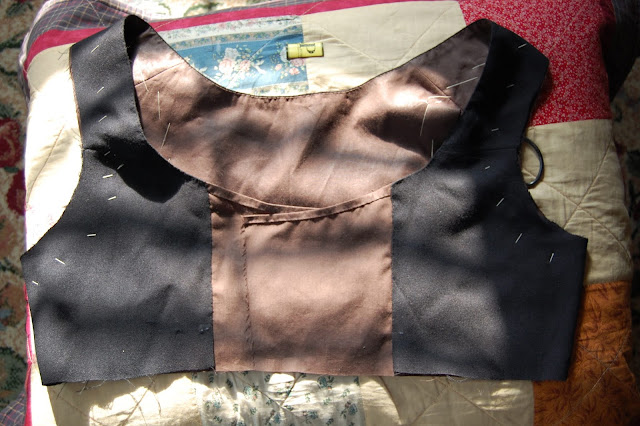
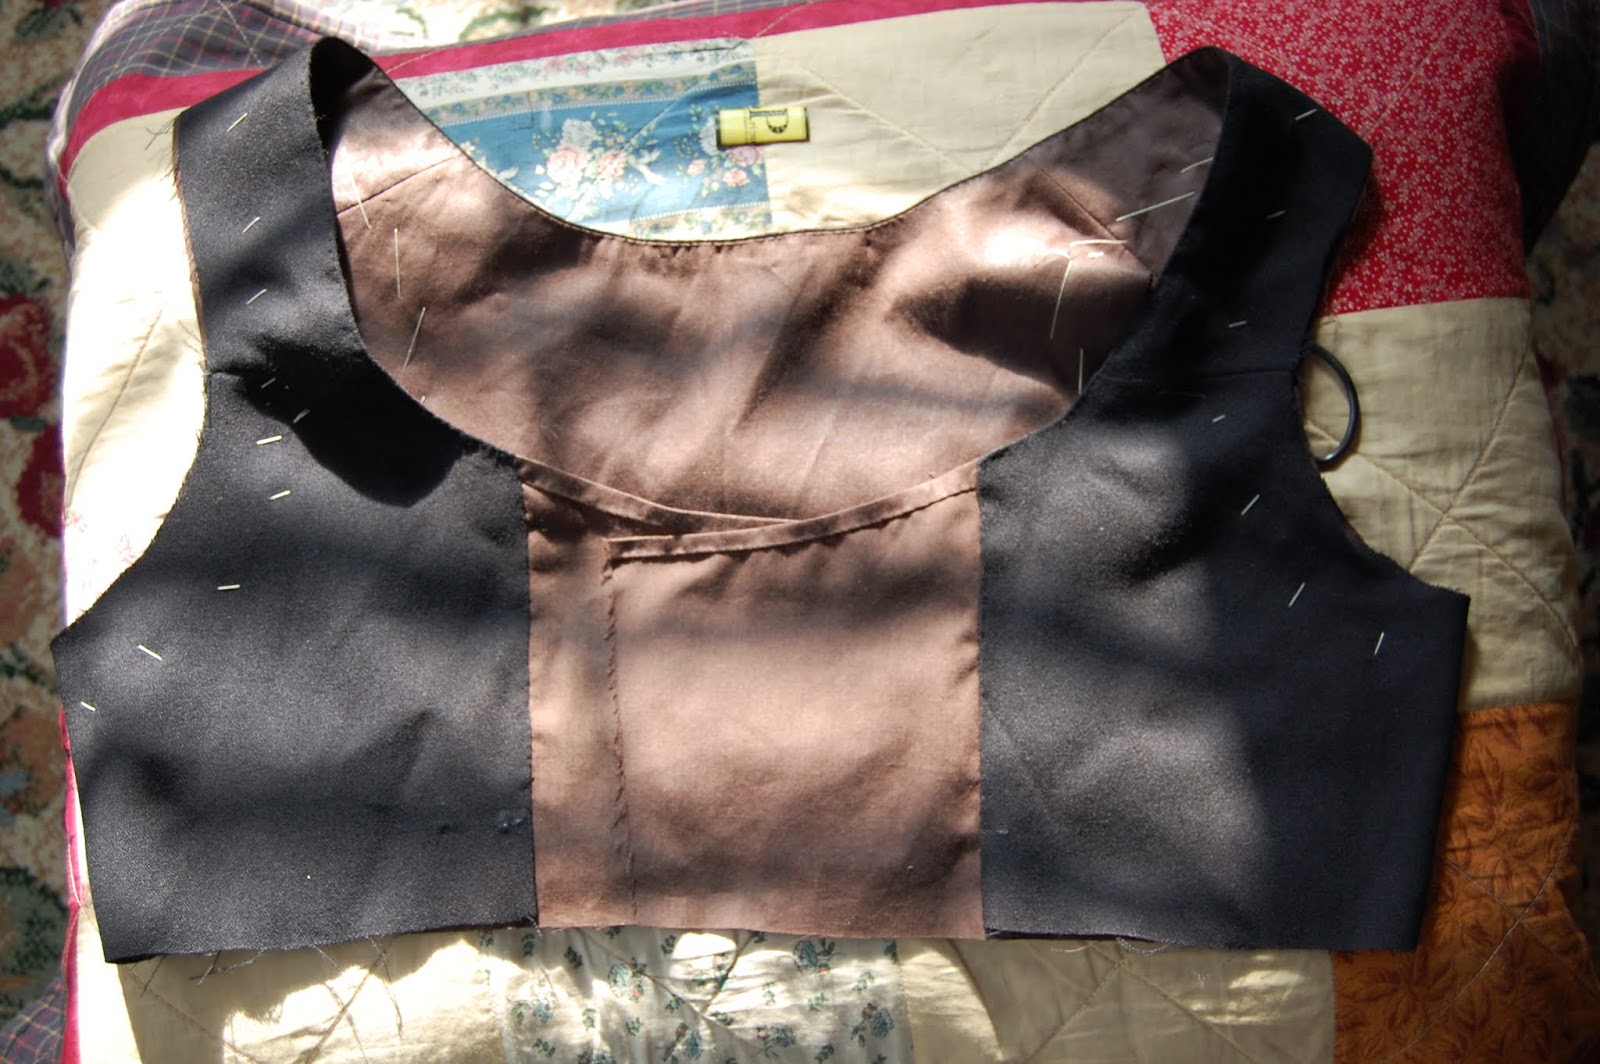
This photo shows the brown lining flap (inner bodice) that will ultimately pin over my bust to hold the dress closed. I've finished the top edge by folding it over the same width as the neck seam that was prick-stitched earlier, 5/8" then tucked the cut edge up underneath itself.  A simple whip-stitch secures it in place. The front edge of the outer bodice (black fabric) was folded in a 1/4"  in a previous step and could now be pinned and stitched with a whip-stitch also. Sewing stopped at the lowest pin, leaving the bottom edge open.
The body of the bodice is together. Note that the center edge of the brown flap and lower edge of the bodice is not sewn yet. I will do these in a later step. 
Now I need to decide what to do for sleeves or maybe just work on the skirt first.

To be continued.....


Other posts related to this project

Making an early 19th century mourning dress: The Skirt

Making an early 19th century mouning dress: Skirt, Bodice, and Bib

Making an early 19th century mouning dress: Sleeves

Tuesday, August 6, 2019

CUFFS WORN DURING MOURNING.


In preparation for our upcoming “Mourning Col. Stephenson” exhibit in October at the 1820 Col. Benjamin Stephenson House (Edwardsville, IL), I offer the following insight regarding cuffs worn during mourning from The Workwoman’s Guide published in 1838, page 76.

[One nail =  2  1/4” ]


CUFFS


PLATE 10  
FIG. 22

This is a neat cuff to lay on the dress, and is either made of plain net, of lace, or of muslin, with or without edging, and sometimes of satin ribbon. If for mourning, the net should have a broad hem. It is gathered and sewed into a band about one nail [ 2 1/4”] deep, and three or three and a half wide, according to the size of the wrist. There should be two pearl button set on one end, and buttonholes made to correspond.

PLATE 10
FIG. 26

A cuff worn in deep mourning, especially by widows, and made wither of clear muslin or black crape. It consists of fold lying upon fold, and is either sewed upon the sleeve or made to slip over the hand. The folds are four or five in number, and lie just one above the other, each being about a quarter of a nail  [ 2 1/4”] deep.


PLATE 10
FIG. 28

This is a neat simple little cuff. It is well adapted for mourning. Cut two pieces of muslin, net, lawn, or    cambric, of two nails square, and hem each round with a broad hem; sew the two together to the depth of about one nail [ 2  1/4”]; the parts sewed together form a sort of band inside, while the others, being unattached, fall backwards over the sleeve.


PLATE 10
FIG 29
 
A simple plain, mourning cuff, with a brad hem above and below. The cuff to be about two nails [4.5”] deep, and three and a half or four nails [9”] long, according to the size of the wrist.


The parlor of the 1820 Col. Benjamin Stephenson as it appears in October during the "Mourning Col Stephenson" exhibit.


Thursday, July 25, 2019

A Early 19th Century Apron


In this post, you will learn how to hand sew a reproduction, early 19th-century apron. This apron is one of the simplest styles to sew. It’s also very quick to make up.
I recommend using a small checked homespun fabric for this project. It will make cutting the pieces easy and precise.

Step One: Decide how long you want your apron to be. Our historic site interprets the 1820s when clothing styles were still high-waisted. We measure from under the bust to mid-shin. Cut out a piece of fabric the full width of the fabric (selvage to selvage) and the length measurement (under bust to mid-shin).  To make cutting easy and precise, follow one of the lines (rows) made up in the weave. An even easier method than cutting is to tear the fabric from one selvage to the other; this will give you a straight line all the way across to the other side. Mark where the tear will begin on one selvage edge. Using scissors, make a small cut at the mark then proceed to tear the fabric with your hands from one side to the other.

Step Two: Take one of the cut/torn edges and turn it over 3/4” and press.  This will be the top edge of your apron panel. Try to follow one of the lines in the weave to keep it nice and even.

NOTE: If using homespun fabric (like we are) you will not need to finish the selvage edges.
Step Two: The top edge is folded over and pressed. 


Step Three: Using a strong thread (e.g., hand quilting or upholstery thread), sew a running stitch across the top about 1/8" - 1/4” from the folded edge. Be sure to keep your running stitches even and no larger than 1/4” wide (about two squares wide in this photo)  Do Not Use A Wide Stitch!! Also, don’t tie off the thread when you reach the other end. It will be pulled to create gathers in Step Thirteen.


Step Three


Step Four: Once you’ve finished the first line of running stitches, sew another line of running stitches 1/4” - 1/2” below it. Try to mirror the first line of stitches as closely as possible. These two lines of identical stitches will become ‘Gauge/Carriage Pleating” when you put the waistband on in Step Thirteen. Don’t tie off the thread at the end.

Step Four


Step Five: Before putting on the waistband and working with the “Gauge/Carriage Pleating” you need to sew the hem. Press the cut/torn edge at the bottom of the apron panel over 1/4”. Fold it another 1/4”, press, and pin. 

NOTE: Be sure to fold the cut/torn edge to the same side as the top edge.


Step Five: folding over the hem edge 1/4" plus another 1/4".


Step Six: Using a whip stitch, sew the hem in place. Try to keep your stitches small; they’ll hold up longer.


Step Six: Sewing the hem-stitch.


Step Seven: The width of your waistband will depend on how far you want the apron to extend to each side of your torso and how wide you want your waistband to be. Our waistband is 16 3/4” long by 3” wide.


Step Seven: The waistband is cut out and measures 16 3/4” long by 3” wide.


Step Eight: Fold in both short sides of the waistband piece 1/4” and press.


Step Eight: Folding the waistband's side edges in 1/4".


Step Nine: Fold the waistband in half, matching long edges, and press.


Step Nine


Step Ten: Open the waistband up and fold the top half to the center line and press. Repeat with the bottom half.


Step Ten


Step Eleven: Fold the waistband in half again and press. Now all the rough edges should be to the inside of the waistband.


Step Eleven


Step Twelve: With right sides together, pin the center point and edges of the waistband to the center point and edges of the apron panel.

Note: Open up the waistband before pinning to apron panel. Pin only one edge of the waistband to the apron panel at this time.


Step Twelve: Center points and outside edges matched.


Step Thirteen: With right side together, pull the ends of the running stitches to fit the apron panel to the waistband. Pin in place. Be sure the gathers are distributed evenly the length of the waistband.

Note: Wrap the ends of the gathering threads around a pin to hold the gathers in place until they are exactly as you want them. Knots can also be used to secure the thread ends.


Step Thirteen


Step Fourteen: Using a whip stitch, attach the apron panel to the waistband.  Be sure to catch just the folded edges of both pieces. The needle needs to be inserted through the center of the ‘hump’ closest to the waistband.

Note: The stitches should be snug but not tight.


Step Fourteen


Step Fifteen: Once one side of the waistband is attached, tie off your thread then gently pull the waistband up above the apron panel. Gently encourage the stitches to straighten out.


Step Fifteen: Waistband and apron panel are sewn together. The waistband is now pulled to extend above the apron panel.


Step Sixteen: Fold over the top half of the waistband to meet the unsewn side of the apron panel. Using the whip stitch, sew the waistband to the apron panel. Be sure to catch just the folded edges of both pieces. The needle needs to be inserted through the center of the ‘hump’ that was not stitched in Step Fourteen. Once this side is complete, tie off the thread.


Step Sixteen


Step Seventeen: Insert a piece of woven tape into the open end of the waistband. Stitch the end closed while catching the tape.


Step Seventeen


Step Eighteen: You're done! Enjoy your new apron!


Saturday, June 22, 2019

Getting Dressed in 1820


Getting dressed for the day in the early 19th century took a bit more time and work than today. There were many more layers, ties, and pins involved. Depending on what type of garment you were putting on, you may even need a helper. A few years back I took a series of photos of my daughter putting on her 1820s garb to show the various steps involved in simply dressing for the day. At the time, she thought getting dressed in period clothes was pretty cool (not so much anymore since she has reached the age of  "Someone I know might see me!"  Gawd, forbid!)

All of the garments pictured are reproductions based on extant clothing in museums and private collections across the country. The dress is an exact copy of one owned by the Missouri Historical Society (MOHS) in St. Louis, MO. 

Note: Before anyone freaks out about me photographing my daughter getting dressed...she was NOT naked under her 1820 garments. She was wearing biker shorts and a camisole. And, she has more 'coverage' in these photos (and 1820s clothes) than modern styles allow.


Layers #1 and #2 - The Shift and Corset


The shift is a very simple undergarment. It is made up of rectangles and squares (usually) with a drawstring at the neck. This garment is closest to the skin; absorbing sweat and providing a protective layer to the outer garments. Unlike outer garments, which were often sewn with the intent of taking them apart at some future point to refashion, the shift was very well made in order for it to hold up to frequent washing.

Her corset (aka stays) is an unboned linen garment that laces up the back. This one is designed for a prepubescent girl. There is no boning to offer support. The only restrictive piece is the wooden busk that runs down the center front. It is very similar to a girls camisole today.


Boned and unboned corsets were worn by children as young as two to offer support for the outer garments. A corset should not be uncomfortable to wear. It's meant to provide a foundation for your outer clothes and support. It should not ride you like a saddle.


Layer #3 - Under Petticoat

This high waisted garment is worn over the previous layers and fastened closed with hooks and eyes, pins, or ties. Some petticoats do not have a bodice attached but are held-up with simple suspenders sewn to the waistband. Ours has a bodice attached and hooks down the center front.  It is similar to a modern-day slip, offering another layer of privacy to sheer garments. In winter the skirt section would typically be made of wool, flannel (different fabric than our modern flannel), or quilted to offer warmth.


Unfortunately, when we took these pictures the bodiced petticoat was not to be found in the wardrobe so I was not able to include a photo of my daughter wearing it.


Layer #4 - The Betsy/Tucker

A Betsy (aka Tucker) fills in the neckline of the dress. It's the 19th-century version of a 'dickie'. The garment usually has a drawstring that ties under the bust then pins, ties, or buttons closed at the neck.  The two pictured below pin closed under the neckline ruffle. The fabric for the one my daughter is wearing is a very lightweight, sheer cotton while the other is batiste.


Layer #5 - The Dress

The dress is an apron front style. The bodice pins closed at the center front with an apron-like front skirt panel pinning to the bodice. This style of dress would have allowed the wearer to easily dress. The trickiest part for the wearer is placing the pins properly.  Our dress is an exact copy of one in the collection at the Missouri Historical Society in St. Louis, Mo. It is made of printed cotton similar to the original.


The center front of the bodice pins closed. There was no evidence of any other type of closure on the original dress. The wooden busk of the corset (sitting directly below the dresses center front) allows for some support, as well as protection from wayward pins. Honestly, we've had little trouble with pins poking the wearer if care is taken in their placement, with or without a corset busk.

Pinning the center front.

Once the bodice center front is closed, the apron panel is pinned onto the bodice at each side, matching the apron with the gathers of the back skirt panels. There is a small band at the top of the apron panel that gives it a finished appearance.
Placing a pin on the apron panel side.
Layer #6 - Stockings & Shoes

My daughter's final items are her stockings and shoes. Here she is wearing cotton clocked stockings but they could be made of silk or wool too. "Clocked" refers to the decorative embroidered design at the ankle/side calf. Garters tied below the knee to hold the stockings up.

Centering the clocked design on the side of her calf.

The shoes she is wearing are leather Jazz lace-ups. Reproduction shoes can be very expensive. This modern dance shoe is passable for period footwear when you're on a budget. They are comfortable to wear but will wear very quickly if worn on tough terrain.


All Dressed! 
Now she is ready for a day of historical adventure at Stephenson House. 

NOTE: These are the basic layers worn by girls and women during the early 19th century. Not discussed here but definitely part of the wardrobe are cloaks, coats, bonnets, hats, and mitts.


Picking out her next outfit....just like her father. 😏