Monday, October 7, 2019

Making an Early 19th Century Mourning Dress: Sleeves


It's finally time to work on the sleeves for my mourning dress. I wanted something a little fancier than I usually wear. Typically, I don't like short, puffed sleeves on my dresses (for a variety of reasons) but several period images kept catching my eye. All of the sleeves had a short, puffy top sleeve with a sheer lower sleeve. My dress is very simple but sleeves like these will offer some visual interest and period style for a very somber dress.  Below are the inspiration images


Madame Angelica Catalini by Rolinda Sharples, c.1814-1821. Smithsonian National Portrait Gallery


Mourning dress in the MET collection, c 1820

The Duchess of Kent and Princess Victoria by Sir William Beechey, c. 1821


As mentioned in previous posts, the pattern used as a base for my dress is Laughing Moon #126 Ladies Round and Trained Gown with High Stomacher Front, c. 1800-1810 with modifications made to the bib. The sleeves in LM #126 were not quite the shape or style I was looking to recreate but they weren't too far off.  Last year I had made a ball gown for the Stephenson House that incorporated the sheer poofed sleeve from  Laughing Moon #138 Ladies Regency Gown, c. 1815-1825. The #138 sleeve was beautiful and exactly what my dress needed to take it into the 1820s. I decided the original sleeve pattern would be combined with #138. The sleeve from #126 incorporated the following from #138; it was shortened, slits were added, and poofs cut.


The original sleeve from #126 was shortened to resemble the sleeve from pattern #138. 


The sleeve's interfacing of wool crepe is marked for slits and pinned to the right side of the sleeve.


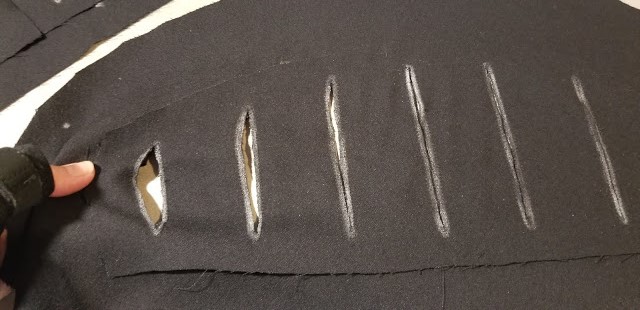
Using the sewing machine, I sewed around the outside of the slit markings on both sleeves.


Once all the slits were sewn the centers were cut open with a pair of sharp, pointed scissors.


The wool crepe interfacing was cut between each slit so it could be turned to the inside of the sleeve.


The bottom sleeve in the photo shows the interfacing turned to the inside and pressed.


Close-up of the right side of the sleeve once the interfacing was turned to the inside and pressed.


Close-up of the inside of the sleeve after the interacting was turned and pressed.


This is one of the silk 'poofs' that will be sewn into the sleeve slits. There were 14 in total. Unfortunately, I did not get a photo of the 'poof' before the gathering stitches were put in. This is how it looks after the gathering stitches were pulled to create the fullness. The instructions in LM #138 do a great job explaining how to attach each piece so I won't go into detail.


It so hard to see what's going on here because of the black on black. Just below my thumb is the silk 'poof'. I'm sewing the gathered poof into the slit with a spaced-backstitch all around the edge of the slit.


Three of the fourteen 'poofs' are attached.


One sleeve with all the 'poofs' sewn in.


How the sleeve looks from the inside once all the 'poofs' were attached.


Because of the weight of the sleeve, I decided to add a partial lining at this point. It's the same polished cotton used to the line the bodice. 


I have no photos of the sleeve being attached to the bodice. None of them really turned out. The black on black made distinguishing what was going on to difficult. Since I had chosen to just modify the original #126 sleeve while keeping the basic shape, all of the pattern placement instructions provided by Laughing Moon would be the same.

For the lower sleeve, I wanted something more fitted than the pattern piece from LM. This sleeve piece would be made out of sheer silk chiffon I found at Fashion Fabrics Club in St. Louis for $15.95 a yard. It was perfect for my lower sleeves and a new neckerchief. This is also the fabric used to make the 'poofs' in the upper sleeve.

Obviously not sheer silk. I did a couple mock-ups of the lower sleeve in order to get the fit I wanted. The sleeve is very long in this photo but after it is hemmed and a wrist band added, it will be the perfect length.


Getting ready to cut the silk. The fitted pattern was cut on the bias to give the sleeve more movement and stretch when I wear it.


Now, if I had been smart I would have sewn a french seam on the lower sleeve instead of the flat -felled seam but hindsight is 20/20. It didn't even occur to me until I'd already sewn in the flat-felled seam that the french seam would have been so much easier (and probably prettier). A rolled hem would be used to finish the wrist edge (not done yet in this photo). At the top, I folded over the edge 1/4" plus another 1/4" and back-stitched it (not done yet in this photo).


Flat-felled seam ready for sewing. Isn't this fabric gorgeous?

Here the lower sleeve is being attached to the upper sleeve. This view shows both sleeves inside out. The lower sleeve is being whip-stitched to the top of the upper sleeves armband. 

The lower sleeve attached to the upper sleeve. All that's left is to create a wristband.


The wristband was cut from the wool crepe the circumference of my wrist plus 1/2" for seam allowance and 1/2" for overlap to close it. The width was roughly 1  1/2". All sides were folded in 1/4" and pressed (the upper piece in photo). Then the band was folded in half lengthwise (the lower piece in photo), pressed, pinned, and all edges were whip-stitched closed.

 A hook was added to one side of the band and a thread bar to the other. This would enable me to close the band around my wrist. 


One short edge of the band was attached to the seam of the lower sleeve about 2" from the wrist edge. The band would hang free of the lower sleeve with the exception of the one short edge sewn to the lower sleeve seam.


THE COMPLETED GOWN!


I have to say I'm VERY pleased with the final gown. This is the fanciest gown in my wardrobe. Usually, my interpretation is of a working-class woman not a fancy widow in mourning. It will be easy to use this dress for other occasions by simply changing my accessories or adding an overdress. I could even pull off 'strict' schoolmistress with some spectacles and ruffly white day cap tied under my chin....😂 Upcoming school tours better watch out! LOL!


Close up of the front. My mourning jewelry is made of silk ribbon with a glass locket containing a miniature portrait of my father. It is attached to my bib with a removable straight pin.

And the back view.  Pardon my shift peeking out.


And it's done! Now on to the next project.


Other posts related to this project

Making an early 19th-century mourning dress

Making an early 19th-century mourning dress: The Skirt

Making an early 19th-century mourning dress: Skirt, Bodice, and Bib


Wednesday, September 11, 2019

Making an Early 19th Century Mourning Dress


Extant bodice c. 1800
During October, the 1820 Col. Benjamin Stephenson House features a month-long exhibit entitled, Mourning Col. Stephenson. Colonel Stephenson died in the house on October 10, 1822. In honor of his memory, we set up each room of the historic home to depict six different vignettes starting with the day that he died. Displays include the sick room, the inventory of all his possessions, and a funeral in the parlor. The primary focus of the exhibit is to educate visitors on mourning customs in the early 19th century and the hardship faced by the Stephenson family after the Colonel's untimely death.

An important part of the exhibit is the clothing our interpreters wear during tours. We want to give visitors an idea of the different types of clothing, fabric, and accessories worn during the mourning process by men, women, and children. The material culture of public displays of mourning is very different in the early 1800s compared to our current practices.

The mourning dress I have worn for several years is lovely dull black silk that drapes like a dream but it's back closing with drawstring ties at the waist and neck. This type of dress is exceedingly difficult for me to finish dressing since I'm not double-jointed or as limber as I used to be. There are also times when there are no other interpreters available to help. This is a real problem when there is a group of visitors waiting for a tour and the docent (me) can't get dressed (the struggle is real, people).  Besides my silk gown is starting to show it's age and it's time for something new.

 In this photo, I'm wearing my silk dress during a past Mourning Col. Stephenson exhibit. 


In truth, I've wanted to make a new mourning dress for a while but just couldn't decide exactly what I wanted it to look like. Most important it needed to be front closing and adjustable. I also wanted it made out of bombazine. Several bolts of bombazine were purchased by Col. Stepheson's widow, Lucy, as she outfitted her family following his death. This fabric was a mixture of wool and silk typically used to create mourning clothes worn during deep mourning. Unfortunately, bombazine is no longer made so wool crepe (another common mourning fabric very similar to bombazine) would have to suffice. The only thing left to figure out was what pattern to use.

Last year, I made a dress for my daughter using Laughing Moon #126 Ladies Round and Trained Gown with High Stomacher Front, c. 1800-1810. The dates of this dress are earlier than those interpreted at Stephenson House (1820-1825) but it's an easy pattern to work with as well as perfect for my needs (front closing and adjustable). It is also very similar to dresses depicted by Anna Maria Von Phul in her paintings of our area (St. Louis, MO, and Edwardsville, IL) in the late 18-teens. It's a perfect dress pattern to use as a jumping-off point for this project.

The internet offered some inspiration but one extant garment, in particular, kept pulling me back. The bodice was the only part of the dress to survive and was sold on eBay as a study garment. The lace around the neckline is simple and elegant plus the bodice is very similar to the LM pattern. I tend to gravitate to simple details since my period garments need to be easy to work in but also a style Lucy Stephenson may have worn. This remanent would be my inspiration.

This bodice was sold on eBay as a study garment. The only information I was able to find said "Original Empire Period Ball Gown Bodice, c. 1800 for study". 

Inside view of the extant bodice. The lining appears to be polished brown cotton but it could also be linen. Without more information or better photos, it's hard to tell. Brown polished cotton was a very common lining fabric during the period.

This bib appears to be attached to the right side of the bodice.  Obviously, the snap was added at a later date. My bib will be attached to the front skirt panel, not the bodice.

Back view of the bodice. I love the faux buttons down the center that match the ones on the bib front. The small peplum is a lovely detail too but not sure it'll be a detail of my new dress. My back piece is also going to be wider since I have the shoulders of a linebacker in full gear but it's also a better representation of the styles of the 1820s.

Let the Sewing Begin!!

Yesterday was spent copying the pattern pieces needed for my size. I never cut my actual paper patterns but trace the pieces onto pattern fabric. This allows me to use all the sizes of a pattern more than once without destroying it for one project. This step took most of my afternoon and evening but it was totally worth it.


The pattern pieces for the bodice are ready to go. 

My mockup went together really quick. It fit perfectly without any adjustments. That NEVER happens to me...EVER!. Usually, something has to be changed or tweaked but not today. The sewing gods were smiling on me.

The fabrics were already in my possession as well. I had already purchased several yards of wool crepe and the polished cotton is a standard item in my fabric stash, so I jumped right in and started putting the bodice together.  This is my favorite part of creating a period garment; construction.  I love it when everything falls into place.


The lining is all sewn together. I used brown polished cotton similar to what I believe the eBay study garment used.

Most of my interior seams are done on the machine these days. In the past, my garments were sewn completely by hand but my hands can't take it anymore. Whenever possible, I sew by hand because it makes the garment lay so much better. Unfortunately, my hands are hurting today so interior seams are getting the machine.

The fashion fabric is sewn together but it's hard to tell in the photo. This black wool crepe has a wonderful drape. The fabric is not very thick. It also has a dull appearance, making it perfect for mourning clothing.

The front edge of the outer bodice is folded under 1/4" in preparation of it being attached to the lining in a later step. It's hard to see it clearly in the photo because of the dark color.

The outer bodice and lining are pinned wrong sides together. The neck edges are folded 5/8"  (could be less but I was using the measurement from the pattern) to the inside and sandwiched between the two layers. The neck edge is ready to prick-stitch. Prick-stitching makes a flat seam when joining two pieces of fabric together.

Step one of the prick-stitch

Step two of the prick-stitch

Prick-stitching as seen from the inside after several stitches.

How the finished prick-stitching looks from the right side of the bodice. 

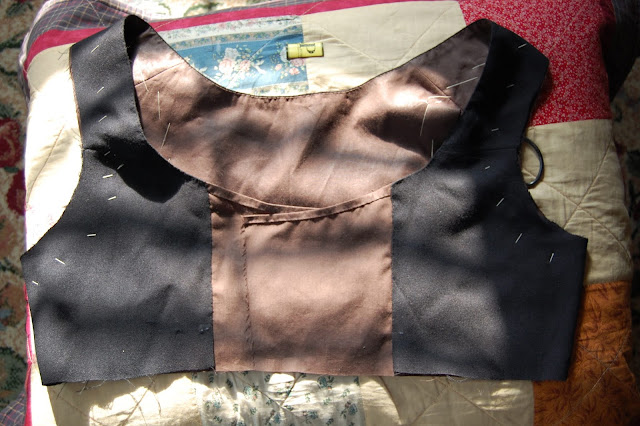
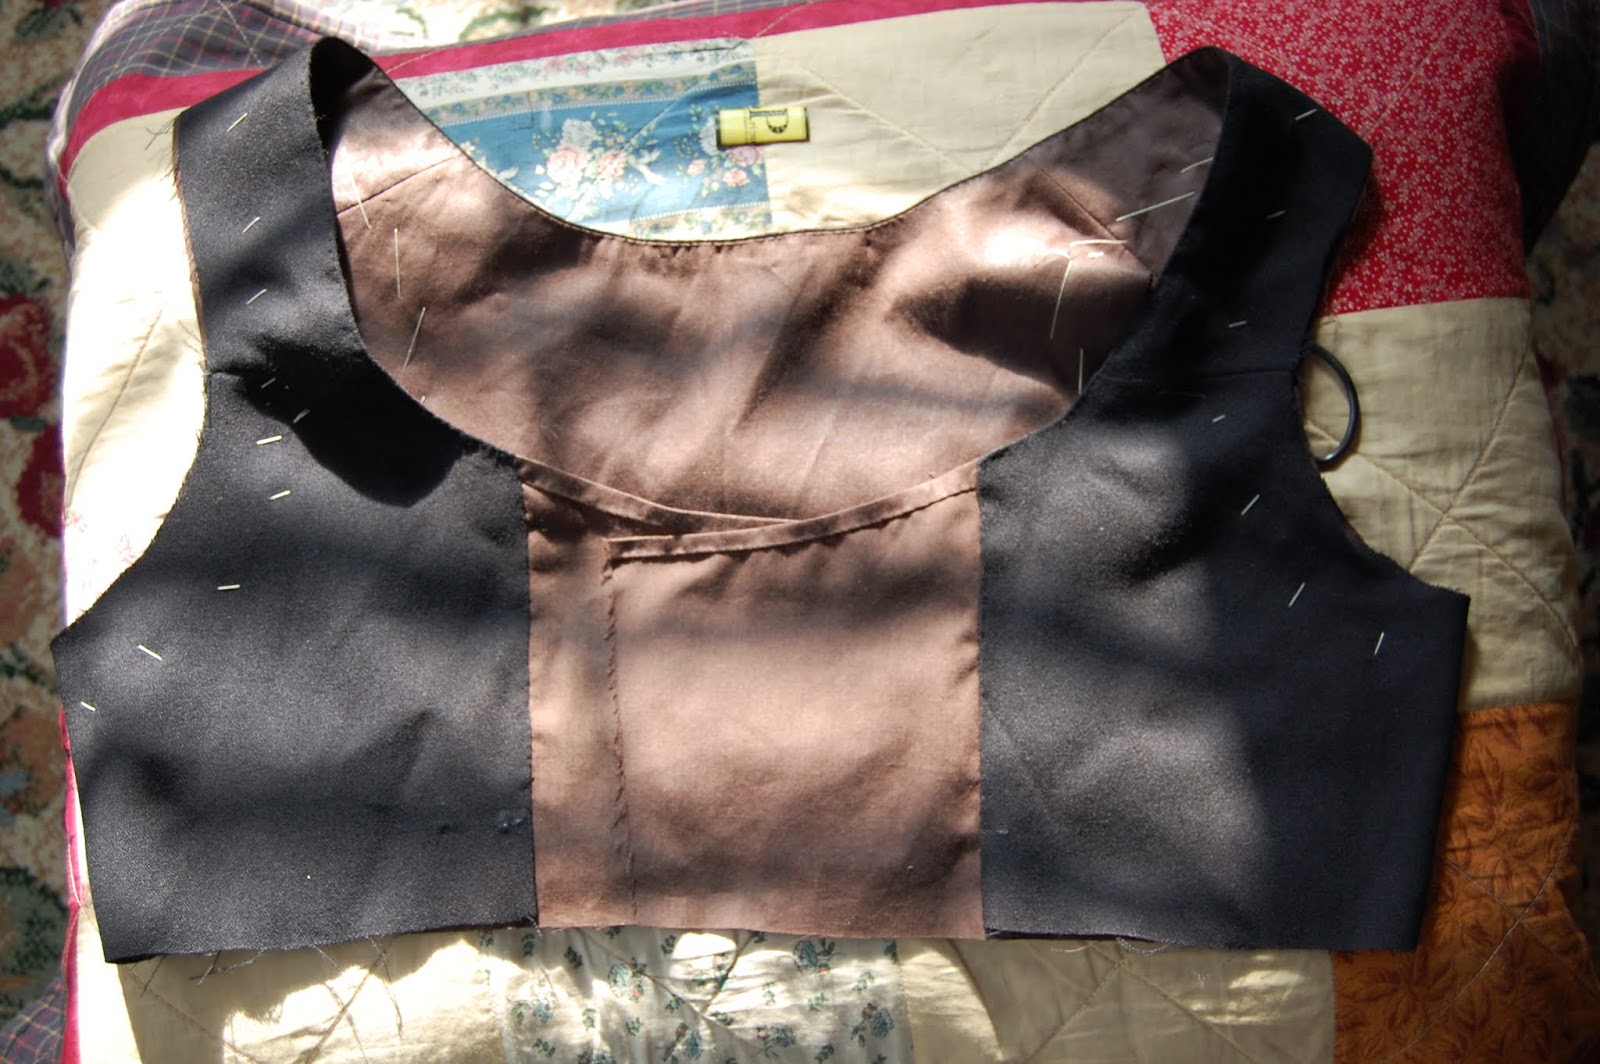
This photo shows the brown lining flap (inner bodice) that will ultimately pin over my bust to hold the dress closed. I've finished the top edge by folding it over the same width as the neck seam that was prick-stitched earlier, 5/8" then tucked the cut edge up underneath itself.  A simple whip-stitch secures it in place. The front edge of the outer bodice (black fabric) was folded in a 1/4"  in a previous step and could now be pinned and stitched with a whip-stitch also. Sewing stopped at the lowest pin, leaving the bottom edge open.
The body of the bodice is together. Note that the center edge of the brown flap and lower edge of the bodice is not sewn yet. I will do these in a later step. 
Now I need to decide what to do for sleeves or maybe just work on the skirt first.

To be continued.....


Other posts related to this project

Making an early 19th century mourning dress: The Skirt

Making an early 19th century mouning dress: Skirt, Bodice, and Bib

Making an early 19th century mouning dress: Sleeves

Tuesday, August 6, 2019

CUFFS WORN DURING MOURNING.


In preparation for our upcoming “Mourning Col. Stephenson” exhibit in October at the 1820 Col. Benjamin Stephenson House (Edwardsville, IL), I offer the following insight regarding cuffs worn during mourning from The Workwoman’s Guide published in 1838, page 76.

[One nail =  2  1/4” ]


CUFFS


PLATE 10  
FIG. 22

This is a neat cuff to lay on the dress, and is either made of plain net, of lace, or of muslin, with or without edging, and sometimes of satin ribbon. If for mourning, the net should have a broad hem. It is gathered and sewed into a band about one nail [ 2 1/4”] deep, and three or three and a half wide, according to the size of the wrist. There should be two pearl button set on one end, and buttonholes made to correspond.

PLATE 10
FIG. 26

A cuff worn in deep mourning, especially by widows, and made wither of clear muslin or black crape. It consists of fold lying upon fold, and is either sewed upon the sleeve or made to slip over the hand. The folds are four or five in number, and lie just one above the other, each being about a quarter of a nail  [ 2 1/4”] deep.


PLATE 10
FIG. 28

This is a neat simple little cuff. It is well adapted for mourning. Cut two pieces of muslin, net, lawn, or    cambric, of two nails square, and hem each round with a broad hem; sew the two together to the depth of about one nail [ 2  1/4”]; the parts sewed together form a sort of band inside, while the others, being unattached, fall backwards over the sleeve.


PLATE 10
FIG 29
 
A simple plain, mourning cuff, with a brad hem above and below. The cuff to be about two nails [4.5”] deep, and three and a half or four nails [9”] long, according to the size of the wrist.


The parlor of the 1820 Col. Benjamin Stephenson as it appears in October during the "Mourning Col Stephenson" exhibit.